loka . 14, 2024 09:09 Back to list
Replacing the Rubber Seal on Your Refrigerator Door for Better Efficiency
Replacing the Fridge Door Rubber Seal A Comprehensive Guide
The refrigerator is arguably one of the most critical appliances in our homes, keeping our food fresh and beverages cool. However, over time, the rubber seal or gasket that lines the fridge door can wear out, leading to air leaks, temperature fluctuations, and higher energy bills. This article will guide you on how to replace the fridge door rubber seal, ensuring your refrigerator runs efficiently and effectively for years to come.
Understanding the Importance of Seals
The rubber seal acts as a barrier that maintains the cool air inside the fridge and prevents warm air from entering. A damaged or worn-out seal can cause your fridge to overwork, leading to increased energy consumption. Additionally, poor seals can create condensation inside the refrigerator, promoting mold growth and compromising food safety. Regular inspections and timely replacements of the rubber seal are essential for maintaining optimal fridge performance.
Signs It's Time to Replace the Rubber Seal
1. Increased Energy Bills If you notice a sudden uptick in your electricity bills, it may indicate that your refrigerator is straining to maintain the desired temperature. 2. Frost Build-up Excessive frost or ice on the freezer walls can be a sign that the seal is not functioning correctly. 3. Visible Damage Look for tears, cracks, or areas where the rubber has come loose from the door frame. 4. Door Hinge Issues If the door does not close properly or pops open on its own, it could be due to a defective seal.
Choosing the Right Replacement Seal
When it comes to replacing your fridge door seal, compatibility is key. Most refrigerator manufacturers provide replacement seals specific to their models. You can usually find part numbers in the fridge’s owner manual or by checking the manufacturer’s website. Additionally, local appliance stores often carry universal kits that can fit various models, but it’s always best to opt for the OEM (Original Equipment Manufacturer) parts to ensure a perfect fit.
Tools and Materials Needed
- New rubber seal/gasket - Warm soapy water - A soft cloth or sponge - A hairdryer (optional for softening the old seal) - Screwdriver (if needed)
fridge door rubber seal replacement
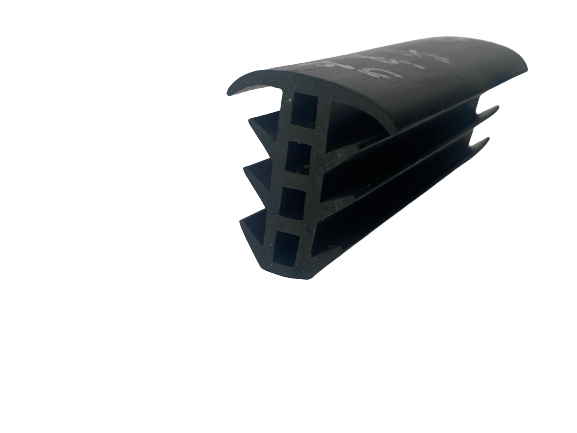
Step-by-Step Replacement Process
1. Remove the Old Seal Begin by opening the fridge door and inspecting the existing seal. If it's held in place with screws, use a screwdriver to carefully remove them. In many cases, the seal simply pulls away, so gently tug it out from the groove.
2. Clean the Door Area Once the seal is removed, thoroughly clean the surface where the new seal will be applied using warm, soapy water. This step is crucial as it ensures a better grip and adherence of the new seal.
3. Prepare the New Seal Before installing the new seal, it can be beneficial to warm it slightly to make it more flexible. You can do this by using a hairdryer for a few minutes; just be careful not to overheat it.
4. Attach the New Seal Align the new rubber seal with the grooves of the door. If your model requires screws, position the seal and secure it by tightening the screws. For adhesive seals, press firmly to ensure it adheres properly.
5. Check the Fit Once the seal is in place, close the refrigerator door and inspect the seal to ensure it is aligned correctly. You should feel resistance when you try to pull the door open. A good seal should not allow any air to leak.
6. Final Cleanup Wipe down any excess soap or dirt and keep an eye on the fridge for a few days to ensure that the new seal is functioning effectively.
Conclusion
Replacing the fridge door rubber seal may seem like a daunting task, but with the right tools and a bit of patience, it can be done easily and efficiently. A well-sealed refrigerator not only conserves energy but also preserves your food’s freshness. Taking the time to ensure that your fridge door seal is in good condition is a small investment that pays off in lower energy costs and improved food safety. If you need assistance, do not hesitate to reach out to a professional appliance technician for help.

